Installation
- Get the Software
- Windows
- Linux
Get the Software
The user can get the latest Zene software by contacting Nabrio at our web page nabrio.com/contact or by emailing us at Hello@Nabrio.com. A representative from Nabrio will be in contact with the user as soon as possible.
Windows
10/ 11/ Server 2019/ Server 2022
To run Zene Windows, the system's CPU must be x86-64 (amd64, x64) architecture.
Install Zene
- Once the user have the installation file (
Setup Zene X.X.X [mode].exe) open the installer. - If the user are prompted to allow the installer to make changes to the computer, click on
Yesto continue.
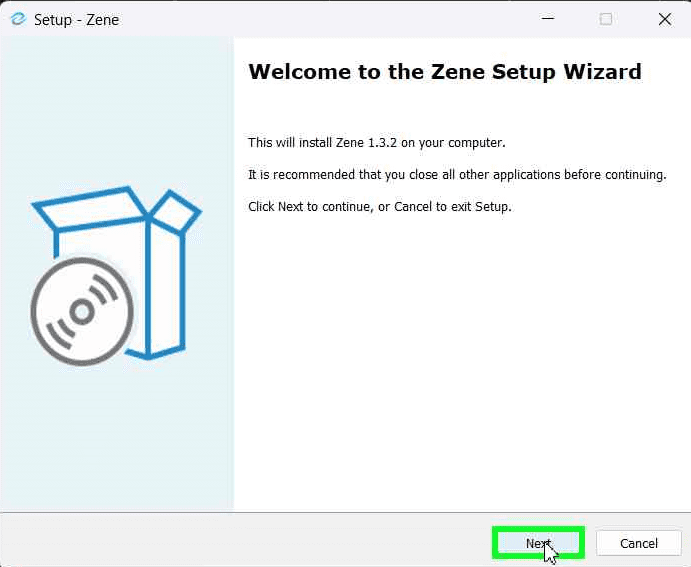
- Once the user have the installation file (
Setup Zene X.X.X [mode].exe) open the installer. - Click on
Next.
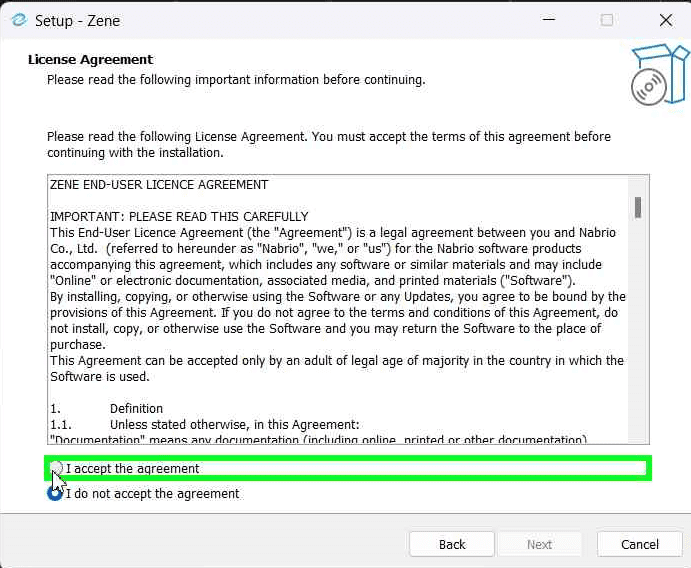
- Read and understand the EULA, click on
I accept the agreementonly if the user accept the terms of the EULA and click onNext.
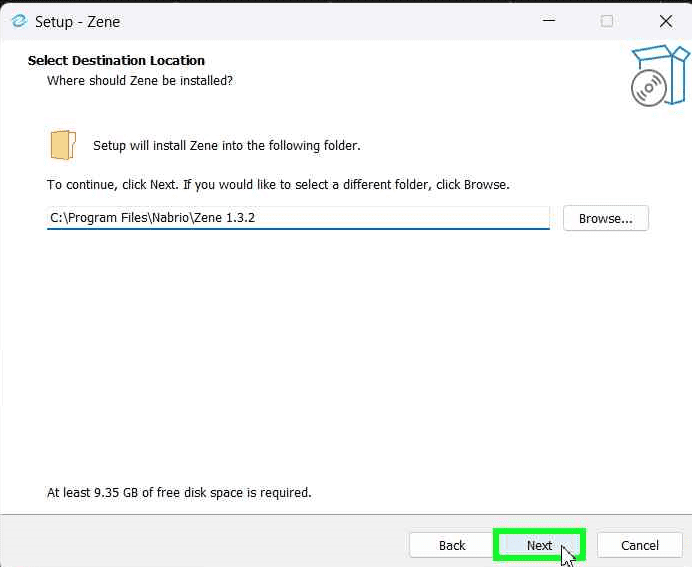
- Choose the installation folder and click on
Next.
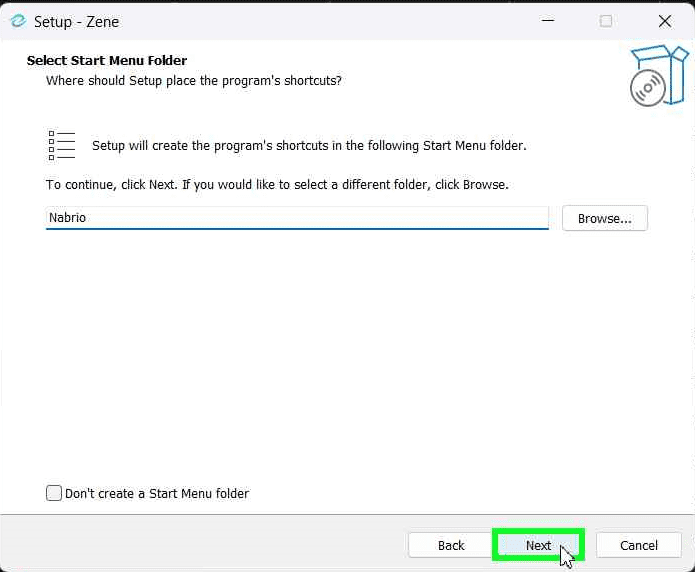
- Select the Start Menu folder and click on
Next.
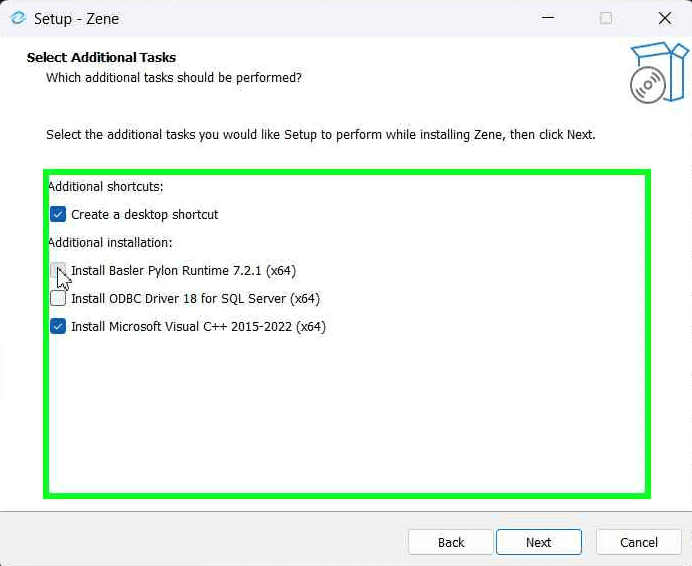
-
Select the additional tasks:
- Create a desktop icon: If the user want to create a desktop shortcut.
- Install Basler Pylon Runtime: If the user need to use a Basler camera with Zene.
- Install ODBC Driver for SQL Server: If the user need to use a SQL Server database with Zene. See SQL Database Config for more information.
- Install Microsoft Visual C++ Redistributable (x64): Required if the user don't have it installed already.
-
Click on
Next.
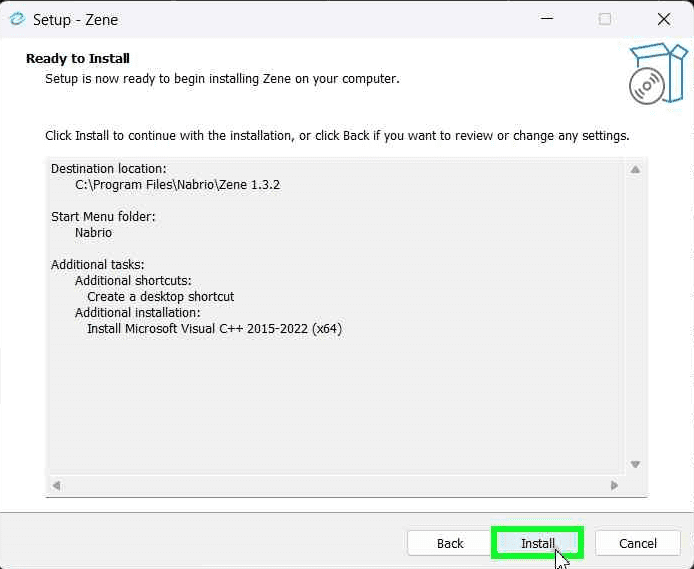
- Click on
Installto start the installation.
If prompted to install the Microsoft Visual C++ Redistributable (x64), ODBC Driver for SQL Server, and/or Basler Pylon Runtime, click on Install and follow the instructions. Once the installation is complete, click on "Finish" to continue with the Zene installation.
DO NOT click on Restart at this stage even if the user are prompted to do so.
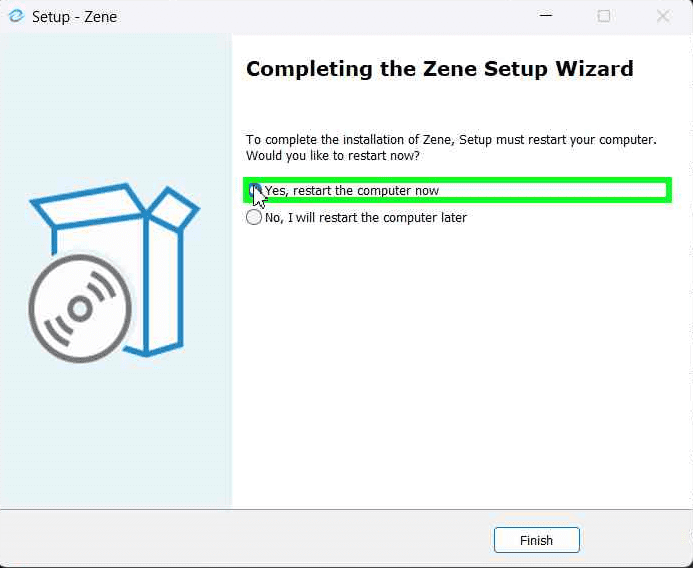
- Click on
Finishto complete the installation. - You are now ready to use Zene!
If prompted to restart your computer click on Yes, restart the computer now and wait for the computer to restart. Once the computer has restarted the installation is complete.
Uninstall Zene
- Go to
Start>Settings - Navigate to
Apps>Apps & features. - Search for
Zeneand click on it. - Click on
Uninstalland follow the instructions.
Linux
Ubuntu 22.04
To run Zene Ubuntu 22.04, the system's CPU must be x86-64 (amd64, x64) architecture.
Install Dependencies
GStreamer
- To install the GStreamer bad plugins run the following command in the terminal:
sudo apt-get update && sudo apt-get install -y gstreamer1.0-plugins-bad
Install Zene
If you have Zene installed already, uninstall it before installing the new version.
Using terminal
- Once the user have the installation file (
zene_[mode]_X.X.X_amd64.deb) open the terminal and navigate to the folder where the installation file is located. - Run the following command in the terminal:
sudo apt-get install -y ./zene_[mode]_X.X.X_amd64.deb - You are now ready to use Zene!
For example, if the Zene installer in the Downloads folder with the gpu mode and version 1.4.3:
cd ~/Downloads
sudo apt-get install -y ./zene_gpu_1.4.3_amd64.deb
Alternative - Using Software Center
- Once the user have the installation file (
zene_[mode]_X.X.X_amd64.deb), navigate to the folder where the installation file is located.
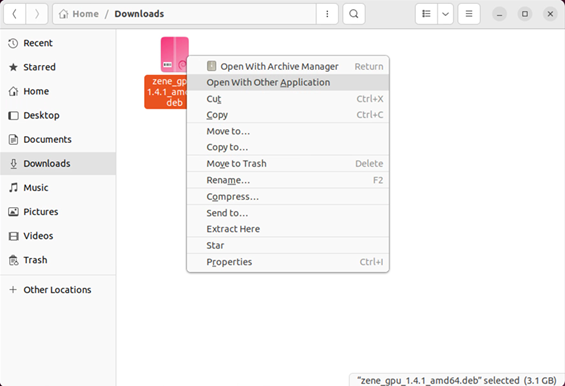
- Right-click on the installation file and click on
Open With Other Application.
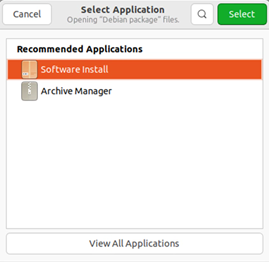
- Select
Open with Software Install.
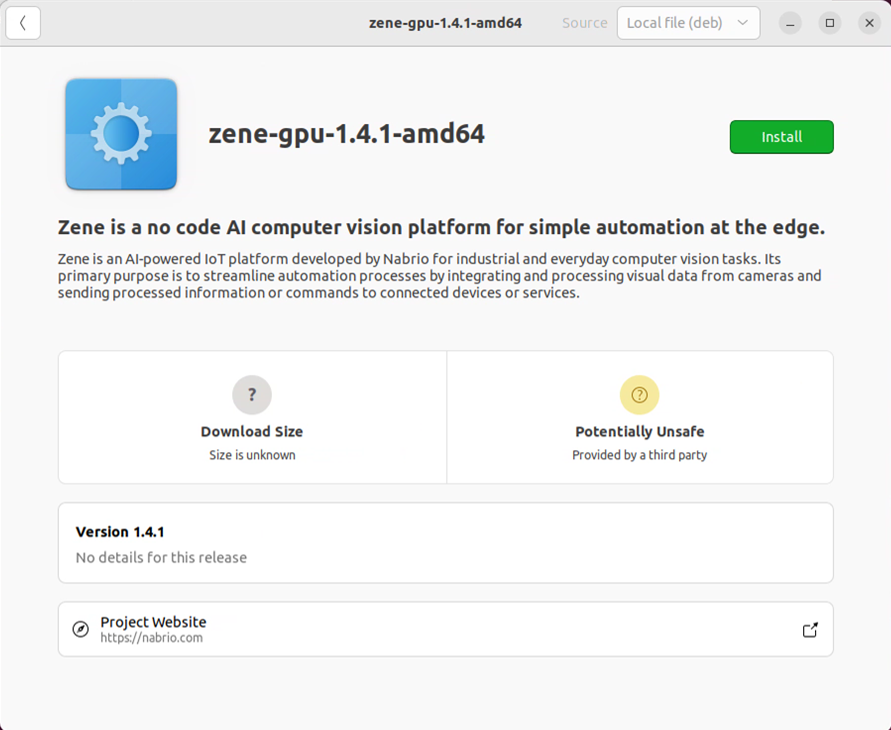
- Click on
Installto start the installation. - Enter the user password and click on
Authenticateto continue with the installation. - You are now ready to use Zene!
Uninstall Zene
- Open the terminal.
- Run the following command in the terminal:
sudo apt-get remove zene - Enter the user password
NVIDIA® Jetson - Jetpack 5.1.1
Install Dependencies
Update the system
- Run the following command in the terminal to update the system:
sudo apt-get update && sudo apt-get upgrade -y
Tesseract OCR
- To install the Tesseract OCR run the following command in the terminal:
sudo apt-get install -y tesseract-ocr
DeepStream SDK 6.2
-
Install the DeepStream SDK dependencies by running the following command in the terminal:
sudo apt-get install \
libssl1.1 \
libgstreamer1.0-0 \
gstreamer1.0-tools \
gstreamer1.0-plugins-good \
gstreamer1.0-plugins-bad \
gstreamer1.0-plugins-ugly \
gstreamer1.0-libav \
libgstreamer-plugins-base1.0-dev \
libgstrtspserver-1.0-0 \
libjansson4 \
libyaml-cpp-dev -
Install librdkafka, run the following commands:
git clone https://github.com/edenhill/librdkafka.git
cd librdkafka
git reset --hard 7101c2310341ab3f4675fc565f64f0967e135a6a
./configure
make
sudo make install
sudo mkdir -p /opt/nvidia/deepstream/deepstream-6.2/lib
sudo cp /usr/local/lib/librdkafka* /opt/nvidia/deepstream/deepstream-6.2/lib -
Download the DeepStream SDK 6.2:
-
Install the DeepStream SDK 6.2:
- Navigate to the folder where the DeepStream SDK is downloaded.
- Run the following command in the terminal:
sudo apt-get install ./deepstream-6.2_6.2.0-1_arm64.deb
Install Zene
If you have Zene installed already, uninstall it before installing the new version.
- Once the user have the installation file (
zene_gpu_X.X.X_arm64.deb) open the terminal and navigate to the folder where the installation file is located. - Run the following command in the terminal:
sudo apt-get install -y ./zene_gpu_X.X.X_arm64.deb
For example, if the Zene installer in the Downloads folder with the gpu mode and version 1.4.3:
cd ~/Downloads
sudo apt-get install -y ./zene_gpu_1.4.3_arm64.deb
Uninstall Zene
- Open the terminal.
- Run the following command in the terminal:
sudo apt-get remove zene
- Enter the user password
Raspberry Pi OS (64-bit) - Debian 12
Install Dependencies
Update the system
- Run the following command in the terminal to update the system:
sudo apt-get update && sudo apt-get upgrade -y
GStreamer
- To install the GStreamer good plugins, bad plugins and tools run the following command in the terminal:
sudo apt-get install -y gstreamer1.0-plugins-good gstreamer1.0-plugins-bad gstreamer1.0-tools
Tesseract OCR
- To install the Tesseract OCR run the following command in the terminal:
sudo apt-get install -y tesseract-ocr
POCO C++ Libraries
- To install the POCO C++ Libraries run the following command in the terminal:
sudo apt-get install -y libpoco-dev
Gnome Terminal
- To install the Gnome Terminal run the following command in the terminal:
sudo apt-get install -y gnome-terminal
Install Zene
If you have Zene installed already, uninstall it before installing the new version.
- Once the user have the installation file (
zene_gpu_X.X.X_arm64.deb) open the terminal and navigate to the folder where the installation file is located. - Run the following command in the terminal:
sudo apt-get install -y ./zene_gpu_X.X.X_arm64.deb - You are now ready to use Zene!
For example, if the Zene installer in the Downloads folder with the gpu mode and version 1.4.3:
cd ~/Downloads
sudo apt-get install -y ./zene_gpu_1.4.3_arm64.deb
Uninstall Zene
- Open the terminal.
- Run the following command in the terminal:
sudo apt-get remove zene
- Enter the user password